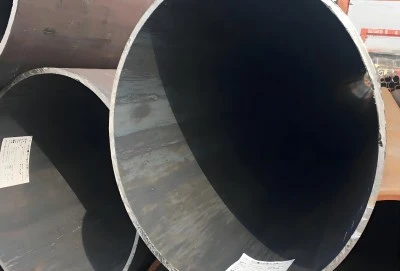
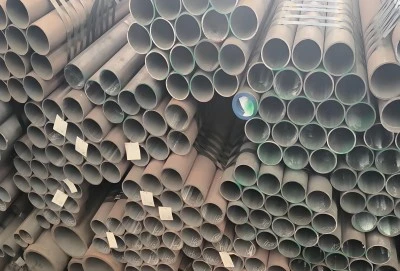
S355 pipe is a high-strength low-alloy steel pipe widely used in construction, energy, and industrial applications. Proper inspection of S355 pipe size and shape is crucial to ensure its quality, performance, and compliance with relevant standards. Key aspects of pipe size and shape inspection include wall thickness, which affects strength and pressure tolerance, length, which must meet project specifications, and curvature, which ensures straightness. Additionally, end face bevel is vital for welding compatibility. Reliable pipe suppliers often provide detailed inspection reports to guarantee that their products meet these critical specifications, contributing to overall project success.
|
|
|
Wall Thickness
Wall thickness is a critical parameter in s355 pipe inspection. It directly affects the pipe's strength, weight-bearing capacity, and resistance to internal and external pressures. Inspectors use various methods to measure wall thickness accurately:
Ultrasonic testing is a common non-destructive method for measuring wall thickness. It uses high-frequency sound waves to detect variations in thickness along the pipe's length. This technique allows for precise measurements without damaging the pipe.
Mechanical gauges, such as micrometers or calipers, are also used for direct measurement of wall thickness at pipe ends or cut sections. These tools provide quick and accurate readings but are limited to accessible areas.
Radiographic testing, using X-rays or gamma rays, can reveal internal defects and variations in wall thickness. This method is particularly useful for detecting localized thinning or corrosion.
Inspectors check if the wall thickness meets the specified tolerances according to relevant standards like EN 10210. They also look for uniformity in thickness along the pipe's length and circumference. Any significant deviations or inconsistencies are noted and evaluated for their impact on the pipe's performance and suitability for its intended use.
Length
Accurate length measurement is essential for proper installation and project planning. S355 pipe length inspection involves:
Measuring the overall length of the pipe using calibrated measuring tapes or laser distance meters. These tools provide precise measurements, especially for longer pipes.
Checking for compliance with ordered lengths and allowable tolerances. Standards typically specify acceptable length variations, which inspectors must verify.
Assessing the straightness of the pipe along its length. This involves placing the pipe on a flat surface and measuring any deviations from a straight line.
Inspectors also look for any signs of damage or deformation that might affect the effective length of the pipe. They ensure that the measured length falls within the specified range and that any deviations are within acceptable limits.
Curvature
Curvature inspection is crucial for s355 pipes, especially those used in applications requiring precise bending or specific shapes. The inspection process includes:
Measuring the radius of curvature using specialized gauges or templates. This is particularly important for bent pipes used in piping systems or structural applications.
Checking for uniformity of the curve along the pipe's length. Inspectors look for any irregularities or sudden changes in curvature that could affect performance.
Assessing ovality, which refers to the deviation from perfect roundness in the pipe's cross-section. Excessive ovality can impact the pipe's strength and its ability to connect with other components.
Inspectors use various tools, including pit gauges, laser scanners, and coordinate measuring machines (CMMs), to accurately measure and analyze curvature. They compare the results against specifications and tolerances to ensure the pipe meets the required shape parameters.
End Face Bevel
The end face bevel of s355 pipes is critical for proper welding and joining. Inspection of this feature involves:
Measuring the bevel angle using specialized gauges or protractors. The angle must conform to specified requirements, typically ranging from 30 to 37.5 degrees, depending on the welding procedure.
Checking the bevel depth and root face dimensions. These measurements ensure that the pipe ends can be properly aligned and welded without gaps or misalignments.
Inspecting the smoothness and uniformity of the bevel surface. A clean, consistent bevel is essential for high-quality welds.
Verifying that both ends of the pipe have matching bevels, unless otherwise specified. This ensures that pipes can be easily joined in the field.
Inspectors may use visual examination, along with specialized gauges and measurement tools, to assess the quality of end face bevels. They look for any defects, such as burrs, rough edges, or inconsistencies that could affect welding performance.
S355 Pipe Supplier
Choosing a reliable s355 pipe supplier is crucial for ensuring the quality and consistency of the pipes used in your projects. When selecting a supplier, consider the following factors:
- Compliance with standards: Reputable suppliers ensure their s355 pipes comply with relevant standards, such as EN 10210. This compliance guarantees that the pipes meet specific requirements for chemical composition, mechanical properties, and dimensional tolerances.
- Quality control processes: Look for suppliers with robust quality control systems in place. This includes regular testing and inspection of their products to maintain consistency and reliability.
- Range of products: A good supplier should offer a wide range of s355 pipe sizes, shapes, and grades to meet various project requirements.
- Certifications: Suppliers with industry-recognized certifications, such as ISO 9001, demonstrate their commitment to quality management and customer satisfaction.
- Technical support: Choose suppliers who can provide technical assistance, including guidance on pipe selection, installation, and maintenance.
- Delivery capabilities: Ensure the supplier can meet your delivery requirements, including lead times and logistics.
LONGMA GROUP is an exemplary s355 pipe supplier that meets stringent quality criteria. Their S355 pipes comply with the EN10210 standard, ensuring high quality, durability, and performance suitable for demanding applications. With a focus on innovation and customer satisfaction, LONGMA GROUP employs advanced manufacturing techniques and thorough quality control processes. For those seeking reliable S355 pipe manufacturers, they offer tailored solutions to meet specific project needs. Interested parties can easily reach out to LONGMA GROUP at info@longma-group.com for detailed product information and expert assistance to support their construction and engineering requirements.


